Install Windows Capability with SCCM/WSUS deployed Windows Updates
I have worked in many environments where access out to external WSUS servers is limited (or not available). This makes sense if you are trying to tightly control the updates that your devices are receiving, but, it does make some of the modern Windows 10 tasks very difficult to manage. For example, if you wanted to install a feature on demand from Settings, you would normally select the Feature that you want to install and it would install.
The problem
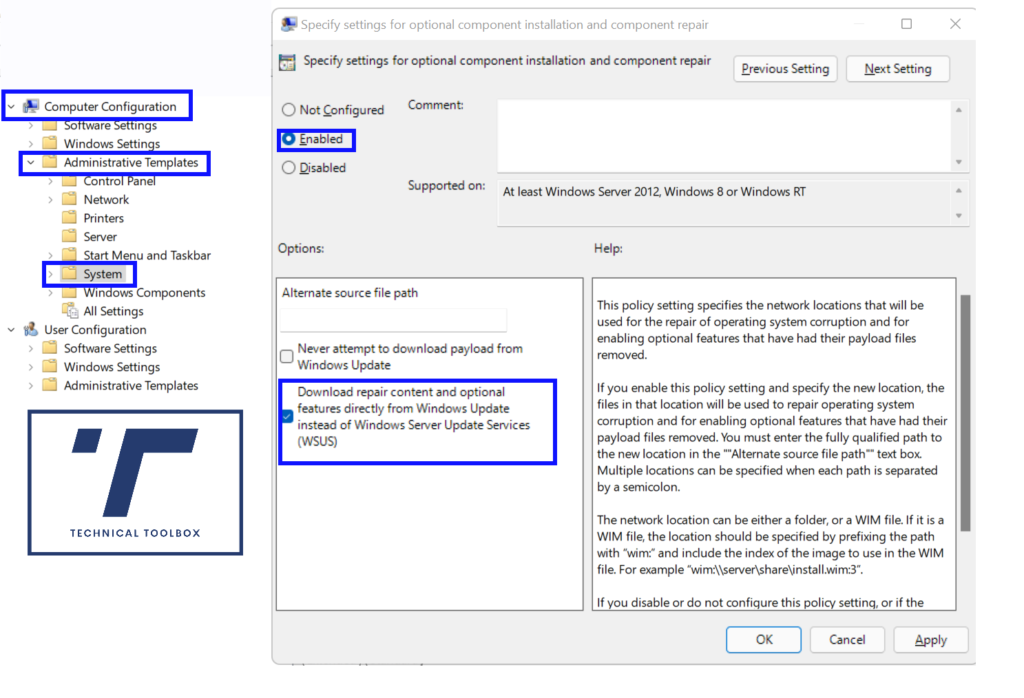
Not if you have a WSUS server configured in your environment. There is a Group Policy setting that you can configure to tell Windows to ‘bypass’ the WSUS server for specific Windows features, that policy is here
Computer Configuration / Administrative Templates / System / Specify settings for optional component installation and repair – set this to Enabled and check the box “Download repair content and optional features directly from Windows Update instead of Windows Server Update Services (WSUS)” – as per below

This may be all you need to do.
Didn’t fix it?
If your environment has gone further and added additional policy settings to prevent external access to WSUS servers (see my other blog post here), then this quick and simple setting is not going to help.
Another way…
Now we need to get creative with some PowerShell. This method is nothing new. I have seen this technique used a fair few times before for things like installing RSAT tools (modify this script to install RSAT in the same way)
In this example we are going to keep things simple and we are going to install QuickAssist (some remove it during OSD)
The PowerShell script turns off the local WSUS server settings, calls out to the online source to install the Windows capability and then turns the local WSUS server settings back on again. To help, I have added comments to explain the script
#Disable using the local WSUS server (for example SCCM)
Set-ItemProperty -Path "HKLM:\SOFTWARE\Policies\Microsoft\Windows\WindowsUpdate\AU" -Name "UseWUServer" -Value 0

#Restart the Windows Update service on the local machine
Restart-Service "Windows Update" -ErrorAction SilentlyContinue


#Add some descriptive text so you know its working
Write-Host "Installing Windows Capabilities" -ForegroundColor Green

#Add the Windows Capability
Add-WindowsCapability -Online -Name App.Support.QuickAssist~~~~0.0.1.0


#Revert the local WSUS server settings to use the local WSUS server again
Set-ItemProperty -Path "HKLM:\SOFTWARE\Policies\Microsoft\Windows\WindowsUpdate\AU" -Name "UseWUServer" -Value 1

#Restart the Windows Update service on the local machine
Restart-Service "Windows Update" -ErrorAction SilentlyContinue
Now, check back on your Windows start menu, you will find Quick Assist installed.