Microsoft Defender PowerShell
Today’s quick blog provides some useful PowerShell commands for managing Microsoft Defender for Endpoint preferences. I have found these commands really helpful so I can get applications working on my lab machines and then obtain all the settings ready for deployment. I manage Defender for Endpoint with Intune, but this blog applies to anyone using Defender for Endpoint. You can learn more about Defender in Intune here Manage Microsoft Defender for Endpoint using Intune | Microsoft Learn
Background
When I am testing a new application, its often the case that you need to make exceptions for Attack Surface Reduction rules or Controlled Folder Access Rules. In testing, its easy to simply ‘allow on device’ and your application starts working. But when it comes to rolling that application out, your going to need to transfer those rules to your client workstations. PowerShell can help us explore the list so we get the exceptions right, first time.
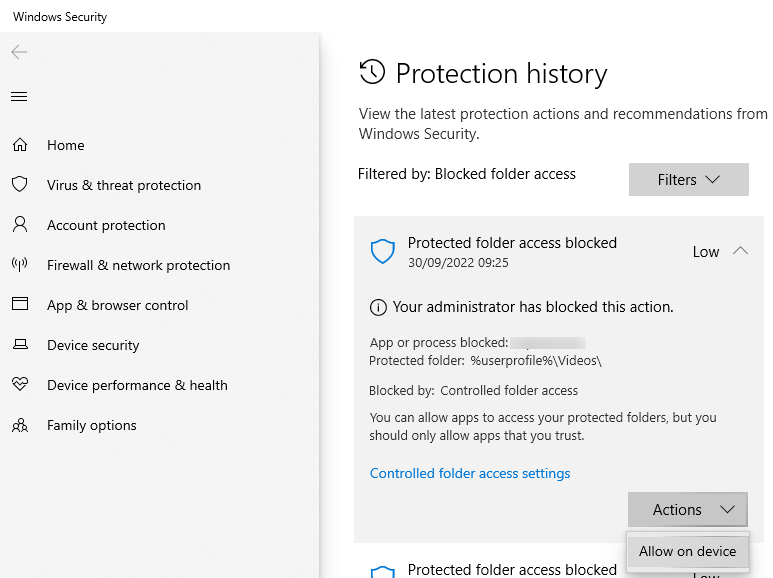
Below you can see the process of adding a rule on a specific endpoint. This is usually prompted by a Security toast notification like this one

You click on the notification and you are returned to the Windows Security settings page
From here, you can allow on device, nice and simple.
Now we know the application works. Lets take a look at how we can explore those rules so they can be added to our policy.
Explore Current Settings
The first thing you will need to do is open PowerShell as an administrator (yes, that includes if you are logged on as an admin). Make sure you right click and run as administrator.
You can then use the following commands to explore the settings
Firstly, to simply view the Defender for Endpoint settings, use this little gem
Get-MpPreference
A short and effective command that will give you all the information about a particular workstations configuration.
Next up, we may notice that some settings have character limits, so we need to dig them out individually
Here we are going to specifically list out the applications/paths excluded for Controlled Folder Access
#Get list of Controlled Folder Access Applications
$Config=Get-MpPreference
$Config.ControlledFolderAccessAllowedApplications
And in this next command, we are going to list out the applications/paths excluded from Attack Surface Reduction (ASR)
#Get list of Attack Surface Reduction (ASR) Exclusions
$Config=Get-MpPreference
$Config.AttackSurfaceReductionOnlyExclusions
Now, we can go one step further…
We can export the data directly to CSV too using the below command.
#Get list of applications allowed in controlled folder access and ouput to a .csv file
$Config.ControlledFolderAccessAllowedApplications | Output-File C:\Temp\CFA_Allowed.csv
This is really helpful because you can use the CSV that is generated to import the settings into the Intune policy.
We can change this PowerShell around as well to work for Attack Surface Reduction exclusions by changing the $Config. variable to AttackSurfaceReductionOnlyExclusions
Change Settings
We can also add and remove applications from the allowed applications through PowerShell as well.
In my example below we add ‘MyApplication.exe’ at a custom path to Controlled Folder Access
#Add application to controlled folder access allowed applications
Add-MpPreference  -ControlledFolderAccessAllowedApplications "C:\MyAppPath\MyApplication.exe"
We can also change that around slightly to remove the same application
#Remove application from controlled folder access allowed applications
Remove-MpPreference  -ControlledFolderAccessAllowedApplications "C:\MyAppPath\MyApplication.exe"
I am sure you have worked out by now that we can change the PowerShell to do the same thing for Attack Surface Reduction rules too but for completeness, here’s the PowerShell
Add…
#Add application to attack surface reduction allowed applications
Add-MpPreference  -AttackSurfaceReductionOnlyExclusions "C:\MyAppPath\MyApplication.exe"
Remove…
#Remove application from attack surface reduction allowed applications
Remove-MpPreference  -AttackSurfaceReductionOnlyExclusions "C:\MyAppPath\MyApplication.exe"
Conclusion
I hope this has helped. Its very easy to configure the exclusions on the workstation so why not configure it all on there and just export the settings. Hopefully making something a little more complicated, a little easier to manage.