Exchange Online – Setup Anti-Spoofing for Free
I hear you, “Free, that doesn’t sound right!?!” Ok, I admit, sort of free. You need to have an Exchange online subscription for a start which is going to cost you. But the key point I am making here is more around not needing to pay for Enterprise Mobility and Security (EM+S) or E5 licensing to get the basic functionality of Anti-spoofing defences.
Its going to take a lot of manual maintenance and setup, but, its costing you nothing more than your time so if you are working on a very tight budget which many organisations are, then this might just be a little trick you can use to add a layer of additional security that you would not normally get. For me, that feels like a worth-while time investment, especially when we consider time it would take to recover from a successful an attack on the infrastructure.
Firstly, lets check, what is email spoofing. Email spoofing is the act of sending an email which appears to be from someone else, you are disguising your identity, usually to try and trick the recipient into thinking its you. If you were an attacker, this would be a great way to get yourself access to the organisation systems by tricking the recipient into doing something, like click a link or send out personal details or passwords.
How can we stop this?
Well, that can be difficult due to the very way that email communications work. However, we have a trick up our sleeve to try and catch some of those dangerous emails.
Enter our ‘free’ solution…
Before we begin, a word of warning, this will block emails that are being sent by the user from their personal or other business email accounts to themselves. This is because the solution is based on checking the display name of the sender in the email. If you are ok with that then carry on, if not, we have an exception section later on to deal with this but you will need some information from your users so watch out for that. Good communication is key.
Lets begin!
Firstly, login to the Exchange Online Admin Center https://admin.exchange.microsoft.com
On the left hand menu click Mail Flow and Rules
Click the plus + and Create new rule…

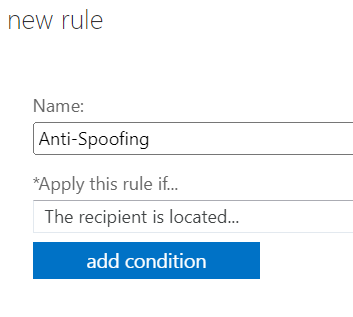
Give the rule a suitable Name
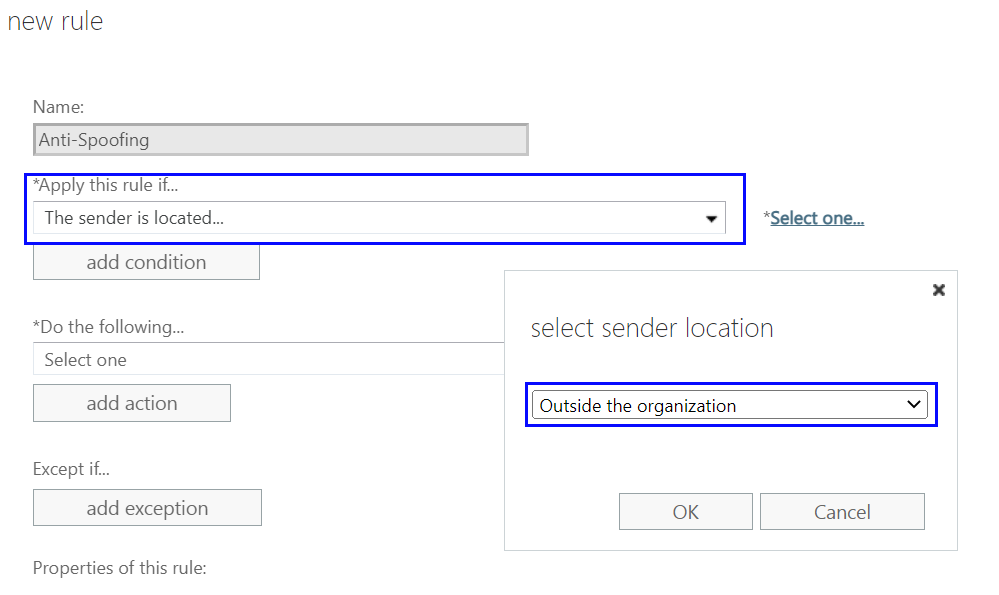
Now, from the dropdown called Apply this rule if… Choose the option The sender is located… then on the popup window, select Outside the organization, then click OK. As shown below
From the bottom of the new rule window click on the blue More Options… link
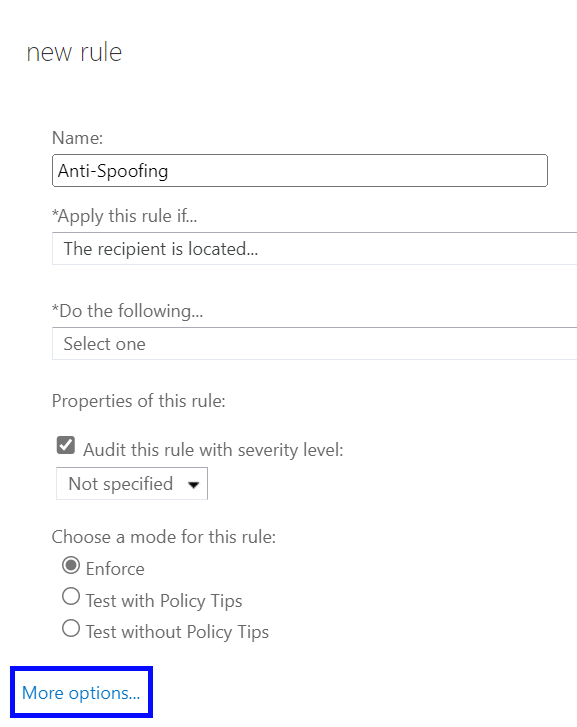
This will then present you with an additional box to add condition
Click on add condition and choose The recipient… Choose is external/internal then on the popup window, select Inside the organization, then click OK.
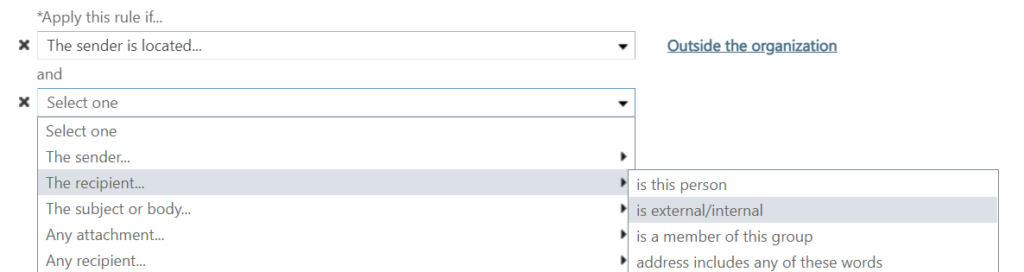
Click on add condition again and then choose A message header… and includes any of these words

Now click the link *Enter Text… and enter into the popup window From
Click the link *Enter Words… and start populating the list with all the possible display name combinations you can think of for your chosen user. You do not need to add an entire new rule for every person, just keep adding the possible display names to the list and this will cover whoever is included.
This rule is focused around the display name being the element we are trying to detect for malicious activity so you need to consider this section carefully to give you the best defence.
As a minimum you will want to include the display name of your user that you have in your organisation, but an attacker will get creative in trying to fool your users into thinking its legitimate so consider other options, like I have done here for Joe Bloggs

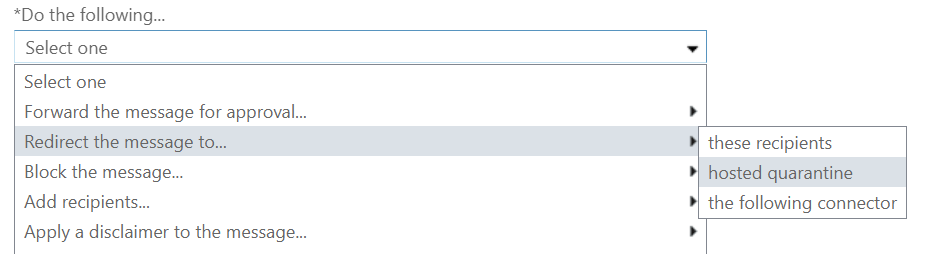
Next we need to add an action
Under Do the following… choose Redirect message to… and choose hosted quarantine so you can release any false positives and get a reasonable overview of whether or not this rule is stopping active attempts.
You can choose to add an exception, this could be helpful is the user emails themselves information from a known, safe, personal or other business account. If their display name is the same on an external account, then these will be blocked as impersonation attempts.

To add an exception, click add exception
Choose The sender… then select is this person

On the member picker window that pops up, you need to enter your exception email address and click check names – we obviously ignore all members listed as they are internal senders and we are creating an external sender exception.
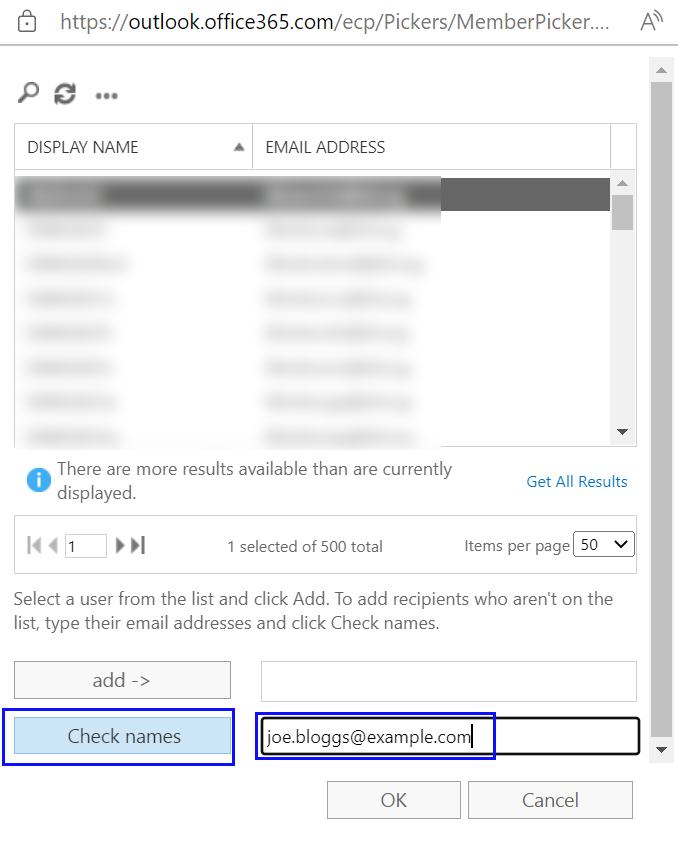
Click OK to create the exception.
Leave all other options as defaults, you should though consider adding comments for best practise to identify the function of the rule and possibly the rule primary contact.
Save the rule and it should start to become active within around 60 minutes. Normally its a lot quicker than this but I have seen it take some time in the past.
The rule will automatically be ticked which means its activated.
Now your done, this is a simple solution that should help low budget organisations get a step closer to better cyber defences.